Upgrading a PC can be an exciting yet daunting process. With numerous components and options available, it often leaves users unsure about the best path forward. The Intel Core i7 9700 is a popular choice for many PC enthusiasts and gamers looking to enhance their system’s performance. Known for its strong performance in both gaming and productivity tasks, the i7 9700 can breathe new life into an older rig or upgrade an already powerful machine. In this article, we will explore the key features of the Intel Core i7 9700, the necessary components for an upgrade, installation steps, and tips for optimizing performance post-upgrade.
Understanding the Intel Core i7 9700
Key Specifications
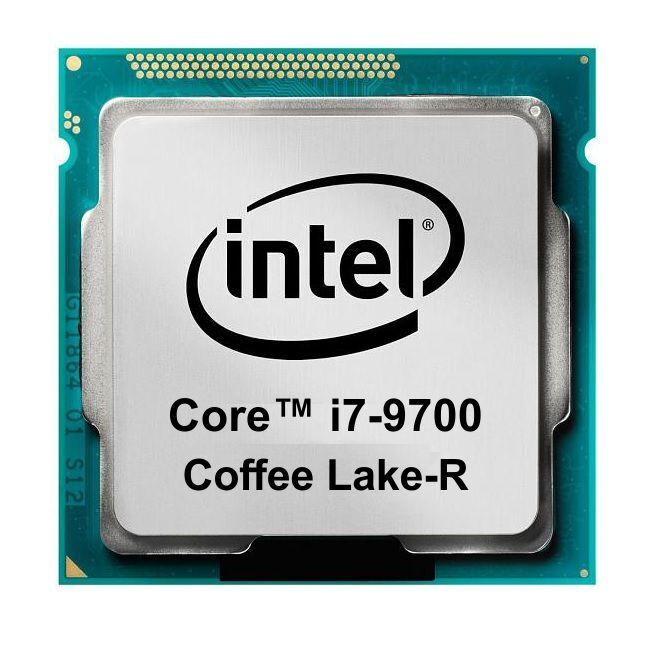
The Intel Core i7 9700 is part of Intel’s 9th generation of processors, known as Coffee Lake. This CPU features eight cores and eight threads, operating at a base clock speed of 3.0 GHz, with a boost clock reaching up to 4.7 GHz. This architecture provides excellent multi-threaded performance, making it suitable for gaming, content creation, and heavy multitasking.
The i7 9700 also has a thermal design power (TDP) of 65 watts, which makes it relatively efficient in terms of energy consumption. The processor supports Intel’s Hyper-Threading technology, allowing it to handle more simultaneous threads, leading to better overall performance in various applications.
Performance Highlights
One of the standout features of the Core i7 9700 is its strong performance in gaming. Many modern titles benefit from the additional cores and threads available on this CPU. In benchmarks, the i7 9700 consistently performs well, rivaling many high-end CPUs from both Intel and AMD.
In addition to gaming, the CPU excels in productivity tasks such as video editing, graphic design, and 3D rendering. The combination of high clock speeds and multiple cores enables users to complete tasks efficiently without significant delays. Overall, the Intel Core i7 9700 offers a balanced performance that meets the demands of various applications.

Preparing for the Upgrade
Assessing Your Current Setup
Before upgrading to the Intel Core i7 9700, it is essential to assess your current setup. This evaluation will help you determine what additional components may need to be upgraded alongside the CPU. For example, check your motherboard model to ensure compatibility with the i7 9700. Most likely, you will require a motherboard with an LGA 1151 socket and a chipset such as the Z390 or B360.
Next, examine your RAM. The i7 9700 can take advantage of high-speed RAM for better performance. Ideally, you would want a minimum of 16GB of RAM, preferably with speeds of 2666 MHz or higher. If you currently have less RAM, consider upgrading during your CPU upgrade.
Identifying Necessary Components
In addition to the CPU, you’ll need the following components for a successful upgrade:
- Motherboard: Ensure that you have a compatible motherboard that supports the Intel Core i7 9700.
- Cooling Solution: The stock Intel cooler that comes with the i7 9700 may be sufficient for some users, but an aftermarket cooler can offer better thermal performance, quieter operation, and improved overclocking potential.
- Power Supply: Check your power supply to ensure it has sufficient wattage and the necessary connectors for the new motherboard.
Having a clear understanding of what components need to be upgraded is crucial for a smooth transition to the Core i7 9700 processor.
Installing the Intel Core i7 9700
Gathering Tools and Materials
Before starting the installation process, gather the necessary tools and materials. You will need:
- A Philips screwdriver
- Thermal paste (if your cooler does not come with pre-applied paste)
- An anti-static wrist strap (optional, but recommended)
Preparing your workspace is also essential. Ensure you have a clean, spacious area to work, along with good lighting.
Step-by-Step Installation Process
- Power Down Your PC: Begin by shutting down your computer and disconnecting all cables. It is crucial to minimize any risk of damage during the installation process.
- Open the Case: Use a screwdriver to remove the screws and open the computer case. Set the side panel aside carefully.
- Remove the Old CPU: Locate the CPU cooler and carefully detach it from the old processor. Follow the manufacturer’s instructions for this process. Once removed, gently wiggle the CPU to release it from the socket, and lift it out.
- Install the New CPU: Carefully align the Intel Core i7 9700 with the socket on the motherboard. Ensure the notches on the CPU correspond with the socket. Gently lower the CPU into place and secure it by lowering the socket lever.
- Apply Thermal Paste: If your cooler does not have pre-applied thermal paste, apply a small, pea-sized amount to the center of the CPU. This paste helps with thermal conductivity between the processor and the cooler.
- Reattach the CPU Cooler: Install the CPU cooler following the manufacturer’s instructions. Make sure it is securely attached and connects to the appropriate power header on the motherboard.
- Close the Case: Once everything is secured and connected, close your computer case and reconnect the power and peripherals.

BIOS Settings and Initial Boot
Accessing the BIOS
After upgrading the CPU, the next step is to check your BIOS settings. Power on your PC and immediately press the designated key (usually “Delete” or “F2”) to enter the BIOS setup. This step is essential for ensuring that the system recognizes the new processor and is configured correctly.
Configuring BIOS Settings
In the BIOS, navigate to the “CPU Configuration” section. Here you can verify that the Intel Core i7 9700 is recognized, displaying the correct model and clock speeds. You may also want to enable XMP (Extreme Memory Profile) if your RAM supports it. This can improve RAM performance by automatically adjusting speed and timings.
Be sure to save your changes before exiting the BIOS. Once you exit, your PC will reboot, and you can proceed with your operating system loading.
Optimizing Performance
Installing Drivers and Updates
After the successful installation of the Intel Core i7 9700 and booting into your operating system, it’s time to install drivers and updates. Visit the manufacturer’s website for your motherboard and download the latest drivers, including chipset, audio, and LAN drivers.
Updating your operating system is equally important. Ensure you install the latest updates from Microsoft or your OS provider to optimize performance and security. Properly installed drivers can significantly impact system stability and performance, ensuring that your hardware operates smoothly.
Overclocking Opportunities
For users seeking to push performance even further, the Intel Core i7 9700 offers overclocking capabilities. To overclock your CPU, return to the BIOS and access the overclocking settings. Make adjustments to the CPU multiplier and voltage to achieve higher clock speeds. Monitor temperatures closely to ensure that the cooler can handle the increased thermal output.
Numerous software tools are available for performance monitoring and stress testing, allowing you to fine-tune your CPU settings safely. However, keep in mind that overclocking can void warranties and may lead to instability if not done correctly. Research and proceed with caution.

Testing Performance
Benchmarking Tools
After completing the installation and optimizations, it is advisable to test your system’s performance. Utilizing benchmarking tools can provide insights into how well the Intel Core i7 9700 is performing in your system. Popular benchmarking software includes Cinebench, 3DMark, and UserBenchmark.
These tools evaluate various aspects of your CPU’s performance, such as single-threaded and multi-threaded tasks. By running these benchmarks, you can assess how your system compares with others and track performance improvements after the upgrade.
Real-World Performance Tests
In addition to synthetic benchmarks, conducting real-world performance tests is essential. Recommend running demanding applications or games to evaluate how the i7 9700 handles high workloads. Check for frame rates, load times, and overall system responsiveness during these tasks.
Monitoring temperatures during these tests is equally important. Ensure that the cooling solution maintains optimal temperatures under load; excessive heat can lead to throttling and reduced performance.
The Benefits of Upgrading to Intel Core i7 9700
In summary, upgrading to the Intel Core i7 9700 can be a transformative experience for any PC user. Its exceptional performance in gaming and productivity tasks makes it a versatile choice for various applications. Proper preparation and understanding of the necessary components and processes can lead to a smooth upgrade experience.
By following the installation steps outlined in this guide and optimizing performance, you can fully utilize the capabilities of the i7 9700. Regularly testing your system after the upgrade can ensure that you’re getting the most out of your investment.
Ultimately, the Intel Core i7 9700 provides a balanced blend of power, efficiency, and advanced features, making it an excellent choice for gamers and professionals alike. Embrace the potential of your upgraded PC and enjoy the enhanced experience that the Intel Core i7 9700 brings to your computing journey.


